Say Goodbye to Transmission Leaks with These Bellhousing Repair Techniques
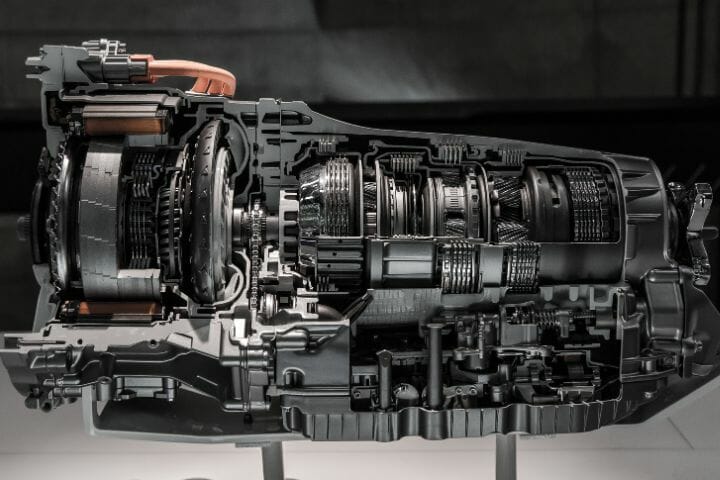
A bellhousing is an essential component of a vehicle’s transmission system. It is a metal housing that connects the engine to the transmission and provides protection and support for the clutch and flywheel. The bellhousing also contains the torque converter, which is responsible for transferring power from the engine to the transmission.
Having a healthy bellhousing is crucial for the overall performance and longevity of your vehicle. A damaged or leaking bellhousing can lead to serious transmission problems and even complete failure if not addressed promptly. It is important to understand the signs of a damaged bellhousing and take appropriate action to repair or replace it.
Signs of a damaged bellhousing include fluid leaks, unusual noises, difficulty shifting gears, and vibrations while driving. If you notice any of these signs, it is important to have your vehicle inspected by a professional mechanic to determine the cause of the problem and take necessary steps to repair it.
Common Causes of Bellhousing Leaks and How to Identify Them
One of the most common causes of bellhousing leaks is a faulty seal or gasket. Over time, these seals can wear out or become damaged, leading to fluid leaks. Another common cause is a cracked or damaged bellhousing itself, which can occur due to excessive heat, impact, or corrosion.
To identify a bellhousing leak, you may notice fluid pooling underneath your vehicle or dripping from the transmission area. You may also notice a burning smell or see smoke coming from under the hood. Additionally, you may experience difficulty shifting gears or notice unusual noises while driving.
If you suspect a bellhousing leak, it is important to have your vehicle inspected by a professional mechanic. They will be able to identify the source of the leak and recommend appropriate repairs.
Step-by-Step Guide to Repairing Bellhousing Leaks
Repairing a bellhousing leak can be a complex process that requires specialized tools and knowledge. Here is a step-by-step guide to help you understand the process:
- Preparing for the repair: Before beginning the repair, gather all the necessary tools and materials. Make sure you have a safe and clean workspace to work in.
- Removing the transmission: To access the bellhousing, you will need to remove the transmission. This involves disconnecting various components, such as the driveshaft, clutch, and electrical connections. Follow the manufacturer’s instructions or consult a repair manual for your specific vehicle.
- Inspecting the bellhousing: Once the transmission is removed, inspect the bellhousing for any cracks, damage, or signs of wear. If any issues are found, they will need to be addressed before proceeding with the repair.
- Repairing the bellhousing: Depending on the extent of the damage, you may be able to repair the bellhousing using epoxy or welding. If the damage is severe, it may be necessary to replace the entire bellhousing.
- Reinstalling the transmission: Once the bellhousing is repaired or replaced, reinstall the transmission following the manufacturer’s instructions or consult a repair manual for your specific vehicle.
Tools and Materials You Will Need for Bellhousing Repair
Repairing a bellhousing requires specific tools and materials. Here are some of the tools you will need:
- Socket set
- Wrenches
- Pry bar
- Torque wrench
- Transmission jack
- Sealant applicator
And here are some of the materials you will need:
- Bellhousing sealant
- Gasket or seal kit (if necessary)
- Epoxy or welding materials (if necessary)
It is important to use high-quality tools and materials to ensure a proper repair and prevent future leaks.
How to Remove and Reinstall the Bellhousing Properly
Removing and reinstalling the bellhousing requires careful attention to detail and following the manufacturer’s instructions or a repair manual for your specific vehicle. Here are some general steps to guide you:
- How to remove the bellhousing:
- Disconnect the battery to prevent any electrical issues.
- Remove any components that are connected to the bellhousing, such as the starter motor, clutch, and hydraulic lines.
- Support the transmission with a jack and remove the transmission mount.
- Carefully lower the transmission and slide it out from under the vehicle.
- How to reinstall the bellhousing:
- Clean the mating surfaces of the engine block and bellhousing to ensure a proper seal.
- Apply a thin layer of bellhousing sealant to the mating surfaces.
- Carefully align the bellhousing with the engine block and secure it in place using the appropriate bolts or fasteners.
- Reinstall any components that were removed, such as the starter motor, clutch, and hydraulic lines.
- Raise the transmission back into position using a jack and secure it in place with the transmission mount.
Tips for Preventing Future Bellhousing Leaks
Preventing future bellhousing leaks is essential for maintaining a healthy transmission system. Here are some tips to help you prevent future leaks:
- Regular maintenance: Follow your vehicle’s recommended maintenance schedule, including regular fluid changes and inspections. This will help identify any potential issues before they become major problems.
- Proper installation: When installing a new bellhousing or replacing seals and gaskets, make sure to follow the manufacturer’s instructions or consult a professional mechanic. Proper installation is crucial for preventing leaks.
- Using the right sealant: Use a high-quality bellhousing sealant that is compatible with your specific vehicle’s transmission system. This will ensure a proper seal and prevent leaks.
How to Choose the Right Sealant for Your Bellhousing Repair
Choosing the right sealant for your bellhousing repair is important to ensure a proper seal and prevent future leaks. Here are some factors to consider when choosing a sealant:
- Types of sealants for bellhousing repair: There are several types of sealants available for bellhousing repair, including silicone-based sealants, anaerobic sealants, and gasket makers. Each type has its own advantages and disadvantages, so it is important to choose the one that is best suited for your specific repair.
- How to choose the right sealant: Consider factors such as the temperature range, compatibility with your vehicle’s transmission fluid, and the type of material the sealant will be applied to. Consult the manufacturer’s recommendations or consult a professional mechanic for guidance.
- Factors to consider when choosing a sealant: Consider factors such as the type of transmission system, the severity of the leak, and the overall condition of the bellhousing. Some sealants may be better suited for minor leaks, while others may be necessary for more severe damage.
When to Seek Professional Help for Bellhousing Repair
While some bellhousing repairs can be done by experienced DIYers, there are certain situations where it is best to seek professional help. Here are some signs that you may need professional help:
- Signs that you need professional help: If you are unsure about the cause of the bellhousing leak or do not have the necessary tools or experience to perform the repair, it is best to seek professional help. Additionally, if the damage is severe or requires welding or other specialized repairs, it is best to leave it to the experts.
- Benefits of seeking professional help: Professional mechanics have the knowledge, experience, and tools necessary to properly diagnose and repair bellhousing leaks. They can ensure that the repair is done correctly and prevent further damage or issues down the line.
Frequently Asked Questions About Bellhousing Leaks
Here are some common questions about bellhousing leaks:
It is not recommended to drive your vehicle with a bellhousing leak, as it can lead to further damage and potentially cause a complete transmission failure. It is best to have the issue addressed as soon as possible.
The cost of repairing a bellhousing leak can vary depending on the extent of the damage, the type of vehicle, and the labor rates in your area. It is best to consult a professional mechanic for an accurate estimate.
The time it takes to repair a bellhousing leak can vary depending on the severity of the damage and the availability of parts. In some cases, it can be done in a few hours, while more complex repairs may take several days.
Conclusion: Enjoying a Leak-Free Transmission with Proper Bellhousing Maintenance
Maintaining a healthy bellhousing is crucial for the overall performance and longevity of your vehicle’s transmission system. By understanding the signs of a damaged bellhousing and taking appropriate action to repair or replace it, you can prevent further damage and ensure a leak-free transmission.
Following a step-by-step guide to repairing bellhousing leaks, using the right tools and materials, and taking proper safety precautions will help you successfully repair your bellhousing. Additionally, following tips for preventing future leaks, choosing the right sealant, and knowing when to seek professional help will help you maintain a healthy bellhousing for years to come.
By properly maintaining your bellhousing and addressing any issues promptly, you can enjoy a leak-free transmission and avoid costly repairs or replacements in the future. Remember to consult a professional mechanic if you are unsure about any aspect of bellhousing repair or if you experience any signs of a damaged bellhousing.